Create a Local Chat Assistant with Open AI and Microsoft Chat Copilot
AI-Assisted Proofreading
All articles on this site are written by me. I use AI tools solely for proofreading and editing assistance to ensure clarity and accuracy.
Hello Friends, welcome back to my blog. Today I’m spending some time playing with Open AI, which is a fun and popular topic. What I want to achieve, is the ability to create a chat interface locally (for local development or to start building a plugin for future use cases). What I’m going to use is this repository: https://github.com/microsoft/chat-copilot, which is a free open-source tool that you can get up and running with on your local machine. Up to this point, my only experiences with Chat GPT and Open AI have come in the form of using https://chat.openai.com which is nice, but what if I wanted to start building a plugin and extending this further? Now the GitHub repository that I’m going to walk through, allows you to use either OpenAI or Azure OpenAI. Until a few days ago, I was still a little unclear what that difference meant, and because of that difference, it’s important to address some things before we get too far into this blog post.
So what is the difference?
Really it’s quite straightforward (and no they aren’t the same thing), Open AI is just a public Large Language Model (LLM) that’s being trained all the time by various inputs from the public ecosystem, while Azure Open AI, is just taking all those LLM’s that you know and love and moving them and adding security around them. I would assume they are still learning from the public, but when you use Azure’s version of Open AI, any data that you supply to it, will stay within the confines of your Azure ecosystem. Also, you can use other Azure Cognitive Services, which allows you to use more rich information potentially from your users or the data they provide to power this LLM. And you don’t need to worry about that data escaping into the general population. That is why, today I will be setting everything up to use Open AI only, not Azure Open AI, and it’ll be important whatever I plan to build, must be public information. (no sharing customer or trade secrets to the public LLM)
What is a LLM
Well as I’ve already written out the acronym, it stands for Large Language Model, but what does that really mean
A Large Language Model is a type of artificial intelligence that specializes in language processing. These models are trained on vast amounts of text data and are able to generate human-like text outputs, such as in a chat interface. The technology behind LLMs has advanced rapidly in recent years, leading to many exciting new applications in natural language processing and conversational AI. (Did you know that Chat GPT just wrote that paragraph 🙂)
In today’s article, we aren’t really going to dig too deep into the nuances of Chat GPT 3.5 turbo vs. 4, but we will be using mostly Chat GPT 3.5 turbo in our local development environments, because relatively cheaper to run since it’s not trained on vast amount of parameters like Chat GPT 4. Keep in mind that the more you train a model, the more likely it will be able to provide valuable insights vs. random gibberish. Although I will say, even 3.5 does an excellent job responding to your input, just keep in mind that version 4 is even better.
Getting Started: Repository Setup
Before we can get too deep into this setup, there are a few things we must do first. First, you should go on over to GitHub to the repository that we’ll be setting up today: https://github.com/microsoft/chat-copilot. Likely we will need to make modifications to this repository, so instead of just cloning this repository, I went ahead and forked it over to my own account instead: https://github.com/dylanyoung-dev/chat-copilot-play. This is where we will begin. At this point, let’s go ahead and clone this repository locally.
Getting Started: Open AI - API Access
Now that we have our repository locally, we need to get the API key access information for the Open AI service we’ll be using. Since I don’t currently have access to Azure Open AI, plus honestly for these simple use cases, I don’t have a need for it, I’ll be configuring a key in Open AI directly (and will walk through the steps). But if you want to start with Azure Open AI, the steps are pretty much the same, and you can use those Azure-based LLMs instead, just follow the steps in the Readme for further information (https://github.com/dylanyoung-dev/chat-copilot-play#instructions).
To get our API key that we’ll need to connect to our local Chat Copilot, we’ll need to head over to https://platform.openai.com/overview and make sure you already have an account and are logged in to this account. Once you are logged in, on the top right, you’ll see a picture of yourself (if you configured this) and something that says “Personal”, it’s possible it could say something else if you’ve configured your account differently than the personal account that I have configured. Either way, click on that and it’ll show a new navigation dropdown, and click on “View API Keys”. This is where we will go to create our API key. It’s quite easy to create our API key, just click on “Create new secret key” and then give that key a name, for this blog post, I am going to give my key the name “Microsoft Chat Copilot”, and then click “Create secret key” and then copy your created key, keeping in mind this is the only time you’ll see the key, but you can always go in and delete keys and then recreate them if you lose track of your API key.
Setup our Chat Copilot
Alright now it’s time to setup the repository that we cloned in the previous step. You can follow along with my instructions here, or you can read more in the Read me here: https://github.com/microsoft/chat-copilot#instructions. For this blog, I am on a Windows machine so I am going to go through those steps on the readme. The steps will help you configure this React (for the frontend) and .Net for the Server side application, at some point in the future, I’ll cover how to do these steps with a Next.js or Node-based application, since that makes more sense to me than using .Net.
Let’s open a favorite terminal, make sure you are in “Administrator” mode, and then make sure you are also in the root of your repository. Once you are there, you’ll need to make sure you install the prerequisites and configure your environment, so you’ll need to change the directory to the scripts folder, which you can do with a simple cd .\scripts\ in your favorite terminal. Once you are there now, run the following command:
1> .\Install.ps1
What this will do, is use Chocolatey (if you don’t have it already, it’ll also install this for you) to install dotnet-7.0-sdk which is needed for the Server side interactions, nodejs (for the frontend) and yarn. Honestly, I’m not sure why it installs yarn, since a lot of users use NPM instead. Be aware that this step took a couple of minutes to complete, so walk away and grab something to drink while you wait.
Now with everything installed, you can configure the application. In this step, you’ll need your API key from Open AI that we got in a previous step. If you are configuring the Copilot with Open AI like I am, you would be running the script like this:
1> .\Configure.ps1 -AIService 'OpenAI' -APIKey '<Your Key Here>'
This will configure SSL as well as configure a .env file here: webapp\.env
Once everything goes smoothly (hopefully), then it’s time to start our two services (the React frontend and the API Layer using .Net). To start those services, we now (assuming you haven’t had any issues up to this point) need to run the following command:
1> .\Start.ps1
Now hopefully it magically starts for you, however, it didn’t for me, and I think a lot of that had to do with Yarn being used. The API started just fine, but since I had problems with the Frontend I did end up making some changes. Luckily you don’t need to stop the running API layer, and can make changes to the front-end and then simply run .\Scripts\Start-Frontend.ps1 or you can even start a new terminal window (as an Administrator), and navigate to the web app route here: .\webapp\ and simply run npm run start since the React application is using CRA (Create React App). This setup definitely leaves a lot to be desired so I might make some changes and release a new blog on how to configure that new setup.
I chose to set up a new terminal and run npm run start and then I found there were a lot of dependency issues that I needed to work through. So I just wanted to detail those below, to hopefully help others with those issues. First off, Chocolatey attempted to install the latest Node version (20 or the latest version), but I use Node Version Manager on my machine to manage multiple Node/NPM versions across different projects I work on, and the method of installation with Chocolatey didn’t exactly work well with that setup, so I needed to ensure I have NVM configured to use the latest version by just running the following commands in my terminal/powershell:
1> nvm install "20.3.1"2> nvm use 20.3.134# And to confirm5> node -v6v20.3.17> npm -v8v9.6.7
Once you are done, you can navigate to your .\webapp\ folder and run npm install or npm i and see where that gets you. For me, I was having dependency issues, which I don’t think were related to the node/npm versions I had running. So I ended up just running a npm i --legacy-peer-deps to get it to install correctly. Though honestly, that doesn’t seem to be a good way to handle it, but some of their dependencies didn’t work with React 18.2.
Once you are done, you should now be able to run npm run start to start your React front end. You should now see in your browser at http://localhost:3000/ the running React application. Should look something like the view below:
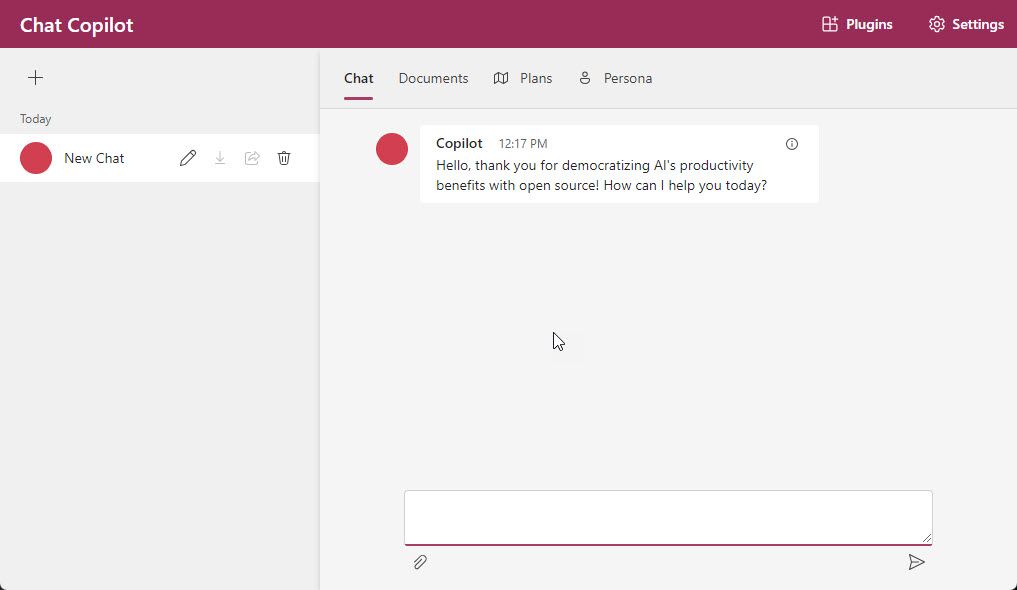
We are now all set to start building a plugin or enhancing this application to add new capabilities or enhance the UI. I think one of my next tasks is to update this to use Chakra UI with React and use the Sitecore Blok design system.
But before we end today’s topic…..
Why Setup a Chat Copilot Locally
So we’ve done all this work and we now have a chat client locally, but what’s the next step from here? Well the purpose behind getting this setup, is so that we can start to create a custom Plugin for Open AI. This could be a copilot that you plan to release as a separate app on the web with a built-in plugin or this could be a local development environment to build your plugin to then release to the Open AI marketplace. We’ll continue this series on Open AI Chat Copilots in the future, so be on the lookout for my next blog on this topic.