Sitecore Personalize: New Developer Focused API Keys
AI-Assisted Proofreading
All articles on this site are written by me. I use AI tools solely for proofreading and editing assistance to ensure clarity and accuracy.
Welcome back friends, today I’m happy to announce a new feature in Sitecore Personalize, which is a new capability of creating access tokens (JWT Tokens) for specific purposes. To learn more about this release, check out this link here from the Developer Portal Change Log: https://developers.sitecore.com/changelog/personalize/developers-can-now-create-api-keys-to-access-personalize-rest-apis. Today’s article is going to spend some time reviewing exactly what this change means for developers. Also, the new documentation pages for Sitecore Personalize include specific use cases for these new user-generated tokens: https://doc.sitecore.com/personalize/en/developers/api/index-en.html.
What are User Generated Tokens
So before we get into what they are, let’s talk a little about why they were needed. Those familiar with the early days of the Sitecore acquisition of Boxever and the existing Boxever product are aware of the concept of a Key to rule them all. This was a single key you would use for almost anything you desired. Unfortunately this key also, with its broad scope, created many security concerns, because once you had the key, it was very difficult to reset it, because you only had one. So if you reset the key, all your services that relied on that key would break at the same time. Furthermore, the key was seen by practically everyone and that created issues when you had partners or developers working on your tenant, but when they left, they still had access to that token. There were many issues with this approach and so that’s why there needed to be a better way of handling this.
This is why there is now a self-service interface to create tokens for specific use cases. What is great about this approach, is that no one can see the key except for the developer/admin that created the key. Furthermore, if that developer leaves the company or the partner that the developer works for leaves the organization, another developer/admin can create a new key, update the key for the automated process and then remove the old key with no issues with downtime during that process. Also, these keys are no longer configured to do anything/everything with the product but are limited to specific use cases. So if you are a developer and you want to configure automated unit tests (which I’ll get to a little bit more about in a second) you can now create a specific key for this specific purpose, which then locks that key from accessing Guest Context or Templates since the token that you’ve created is limited to a very specific use case.
Sounds great, so how do I use it?
Create Your First Token
Before we get ahead of ourselves, there are some limitations, first off, this change specifically relates to Sitecore Personalize and only tenants on the cloud portal. If you are an existing Boxever tenant, don’t worry, likely your tenant will be migrated to the Cloud Portal soon and then you can enjoy these new benefits of the product.
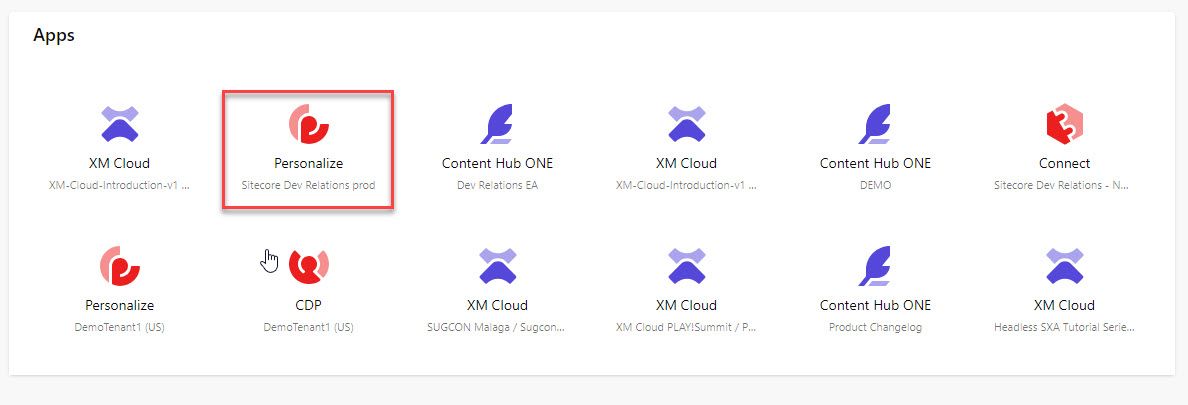
To get to create a new token, the steps are quite simple, you need to log in to your new tenant, which is straight forward because you can log in directly via the cloud portal: https://portal.sitecorecloud.io/. Log in using your cloud portal login credentials. Once you are logged in, navigate to your Personalize tenant:
Once you are in your tenant, it’s quite easy to start managing your API keys, you just need to make sure that your access role is set to either Developer or Admin roles. To get to the new API keys section, you’ll navigate to the header part of the webpage (top portion of the web page) and you’ll hover over and click on Developer Center and select API Keys to navigate to this new page. You should now see a list of keys generated by anyone on your tenant. Keep in mind, you only have the ability to delete these keys, and once you create the key, that will be your only opportunity to copy the key to use for your purposes. Let’s jump into the next section where I’ll cover the latest release of the Sitecore CDP (Personalize) Serializer version 1.8.0 and how you can create a key for the Serializer specifically.
Sitecore Personalize Serializer
Those that are familiar with the content of this blog, are aware that last year at Sitecore Symposium I announced a Node-based Serialization tool for Sitecore Personalize, which uses hidden/lesser-known APIs that would allow a developer to store in a repository all their Sitecore Personalize assets (templates, connections, etc) and then build and deploy those changes using a CI/CD pipeline into Sitecore Personalize. This announcement directly relates to this tool, because it now allows a user of Sitecore Personalize to create a token with the type of “Multiple Resources”, which will cover this specific use case (among others).
When you create your API key, make sure you give it a descriptive name, so that others managing the set of active API Keys have a better understanding of their purposes.
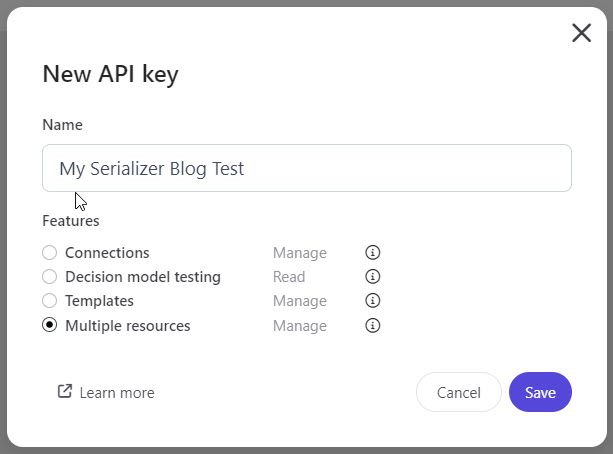
Also make sure to select the Multiple resources above, so that you can manage many different types of developer elements in the product. Specifically, Multiple Resources include CRUD operations on Connections, Templates, Decision Models, Flows (Experiences and Experiments), Conditions, and JS Modules. The only thing at the time of this writing that you can’t control with this access token is the ability to create Offer Templates, but hopefully, in the future, this will be improved/added as well.
Once you have your key, which consists of the Client Key and Secret, you’ll copy these values for future use. You should never share these keys with anyone else, and where ever you plan to use them, such as a GitHub Secret or Azure Key Vault, you should move them directly to that location, so that the risk of someone getting access to those keys is minimal.
Recently I released a new version of the serializer, currently called Sitecore CDP Serializer however I’m considering changing it to the Sitecore Personalize Serializer since the serializer mostly deals with Personalize assets rather than CDP assets. The latest version 0.2.1 includes a new parameter during the auth login where you would pass -c if you want to authenticate with Cloud Portal. The authentication method with these new API Keys is completely different than the traditional api.boxever.com authentication.
1> npx sitecore-cdp-serializer auth login -id "<Your Client Key>" -s "<Your Client Secret>" -l "US" -c
The new authentication uses Client Credentials instead of the password grant type moving forward. So if you are building directly with the APIs keep that in mind. With that change came another improvement within the product. Prior to this release, if you made client credential changes, inside the Personalize interface you would see Unknown if you created elements that made it tough to determine who was making those changes, or really which API keys made those changes. With this new release, however, it’ll now show the key’s name in the listing of elements when you make changes with a key:

Additional Use Cases
In addition to using it with my very own tool, the serializer, there are actually quite a lot of useful use cases that could make sense here. I wanted to provide a few details about those below, with the hopes that I’ll create further content on these in the future.
Unit Testing / Automated Integration Testing
This is actually the use case I had originally planned to create a video to talk about but haven’t been able to prepare that video by the time of writing this content. Sitecore Personalize provides a great way to create tests of various decision models, detailed in this guide here: https://sitecore.cdpknowledgehub.com/docs/decision-models-automated-testing-guide. That guide is great although is even greater now if you create a new API key with the Feature of Decision model testing selected. Now you’ll be able to create a key specifically for your use case. I would recommend only selecting that option if it’s the only thing you need to do. If you plan to deploy your decision models to a tenant and then test, then you’ll likely want to select Multiple resources because otherwise you’ll need two keys and need to authenticate twice.
Other Automated Use Cases
Another great use case for these new REST APIs and the API keys is to use them to create use cases on the fly. If you have an external system, that you’d like to use to create an Experience or a Decision Model based on something in your system, this would be now a great way to achieve this. One use case I think would be extremely valuable at some point, is to create a Generative AI example, of creating experiences/experimentation on the fly. Definitely hope to cover this use case in the future.
Well that sums this up, if you haven’t already, you should plan to check this feature out today and write a blog about your specific use case!