Part Two: Using Extended View Event Data in a Sitecore Personalize Decision Model
AI-Assisted Proofreading
All articles on this site are written by me. I use AI tools solely for proofreading and editing assistance to ensure clarity and accuracy.
For those that did not read my first blog post: https://dylanyoung.dev/insights/sitecore-cdp-personalize-capture-additional-data-in-a-view-event/, I covered the topic of adding additional details to our View Event when someone navigates our website, and in this blog post I’m going to take that information further and show how it can be useful to make smart decisions for experiences that we may be trying to create. In our example, I wanted to capture additional page information, and include the Sanity unique identifier for the pages that the user is visiting. This then allows me to pull details of that page into the decision model and make a judgment about what kinds of information that user may be looking to find on our website. The quick overview is that because the user in the last session or even the current session is looking at Sitecore CDP/Personalize content, we might want to suggest in various parts of our site, hints into other content they might want to see on that same category. This blog will take a step closer to that goal, and then later we’ll start to explore even more complex decisions, potentially using AI as we try to understand the user and what they are viewing and how we can use that information to guide the user to what they might be really looking for on our website.
Using Sanity ID in a Decision Model Programmable
So the next part of this exercise, now that we have been collecting this additional information for some time, is to start working on creating an experience to display based on information that we will pull and parse in our Decision Model. The first step to getting to that point will be to access this guest’s session data and their Sanity ID for their last visit. I wrote the code below that can help us achieve that:
1function getLatestSessionEvents() {2 var lastSanityId = '';34 for (var i = 0; i < guest.sessions.length; i++) {5 var currentSession = guest.sessions[i];67 if (currentSession.sessionType === 'WEB') {8 var events = currentSession.events;910 for (var j = 0; j < events.length; j++) {11 var currentEvent = events[j];1213 if (currentEvent.type === 'VIEW' && currentEvent.arbitraryData && currentEvent.arbitraryData.ext.sanity_id) {14 lastSanityId = currentEvent.arbitraryData.ext.sanity_id;1516 break;17 }18 }19 }2021 if (lastSanityId) {22 break;23 }24 }2526 return lastSanityId;27}2829(function () {30 var lastSanityId = getLatestSessionEvents();3132 return lastSanityId;33})();
The code above is using the data that we stored from our last blog on this topic, to pull that information out and then return the ID if there is one. Now I’ll admit that just having the ID of the article last visited, isn’t all that special, but we’ll combine that with a Connection to our Sanity CMS to get back additional information about that page in a second so that then we can make decisions with that information.
We are obviously skipping some details with that script. Before we get to writing our programmable, we’ll need to also configure our Decision Model and then the Programmable that this code will go into. So let’s start by defining our Decision Model. That is pretty straightforward, as you can navigate to your Personalize tenant and click on Decisioning and then Decision models and then finally click on Create Decision Model and provide your decision model a valid name so that you can begin creating our first decision model. When you first create that decision model, you’ll land on a page that appears to have different swim lanes or columns that represent the state. Unlike anything else (currently) inside Personalize, creating a decision model consists of variants, which those variants go through the workflow. What’s great about this workflow, is you wouldn’t want to have a decision model in production that needs tweaking and run into a scenario where you must stop that decision model in order to work on it. Especially considering that a decision model could be used across many experiences or experiments. So with our first one, we’ll create a variant, which we’ll also give a name. I think generally a best practice here is to give your variant a form of version so that you can keep track of what named version is in production and what is in testing/draft. For example, imagine later on in this world of decision models where you might have primary v1 in the Production state, while primary v2 is in Test, and even maybe primary v3 is in the draft. That can be a pretty powerful process so that you never have untested variants running in production at any given moment.
Anyways enough of that let’s get into creating our variant, click on Add Variant and give our variant a name, I’ll call mine primary v1, but you are welcome to give yours any name that you see fit. Once you have your variant created let’s go ahead and click on the little card that it created now sitting in the draft state. Keep in mind, if you had been creating a new variant with others already existing in this decision model, you could’ve had the variant created from an existing variant, but like I said we’ll cover that at some point in the future in another blog post.
Creating Our Decision Model Variant
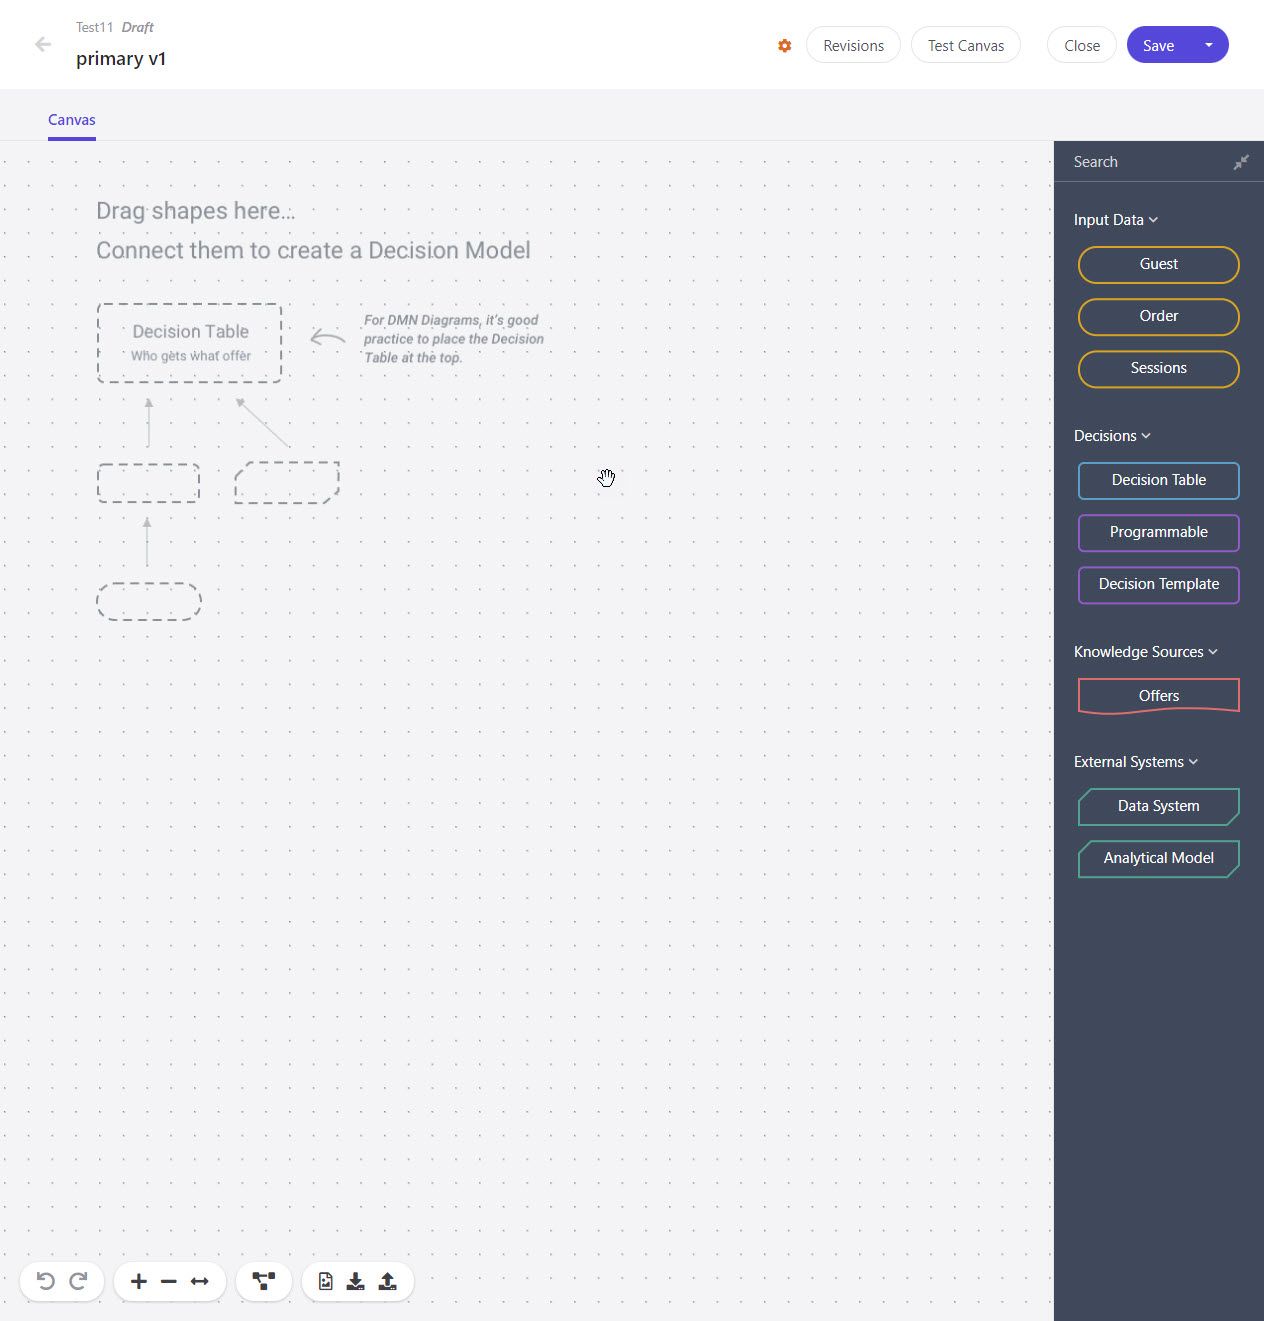
So we are starting with the blank variant shown above, but what we actually need is to place the programmable where we displayed the code above. When you place the programmable, you must give the programmable a name, output reference, and the type of output reference. This is so that we can then use this information later (such as in the Connection to an external Data System that we’ll talk about shortly. For our programmable, I’m going to return a string, because the Sanity ID is alphanumeric, and the output reference will be called “SanityId”. The programmable name is irrelevant, just call it something meaningful to you, so you know what this programmable is doing. Now we are ready to drop in our code. In a future blog, I’ll create some more content on exactly how you would come to write something like this.
Another gotcha for me was realizing that when creating that programmable, I do not need to specify the input data blocks above to pass that data to the programmable, we can just access the guest and its sessions and events. The only thing to watch out for is to make sure you are using the singular or plural form correctly. Once you’ve dropped the code into your programmable, you can now test the canvas to make sure it’s working. Obviously, at this point, you must complete the details in the first blog, or else, you’ll have nothing coming back, but once you have the programmable code dropped in, plus the first blog contents complete, you can now navigate back to your blog/website, and navigate the site. Collect your browser_id from your site or even collect the guest id by following the contents of this blog, where I show how to get the guest id from the Google Chrome console. Once you have that, you can navigate back to your decision model, the correct variant, and the programmable that you created, and then click on Test Canvas, and instead of selecting a known guest, paste in your guest ref. It has to be the guest ref and not the browser id, also make sure you have visited a page that would’ve logged a view event with the arbitrary data about that page content id, and make sure the code you used in your programmable matches what you used in your arbitrary data in the View event. Now click on Test Canvas and you should see something like this:
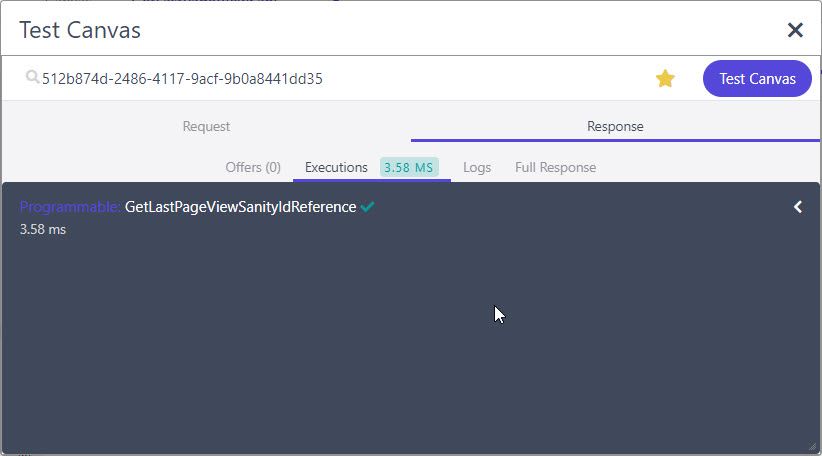
As you can see our programmable is succeeding. If you have any print() in your code (which in my version we don’t), you will see more details in logs, which we’ll talk about more in detail in a future blog post. You have at least two ways to see the output of this test, first, you can click on the little arrow that points left in the screenshot above, next to the test, which will show the result of the test. The second is by clicking on Full Response which will show all the details of what was run and what was returned, including in this case the Sanity ID for this test.
Extra Credit
For today’s post, this will conclude with how to use the data that we are tracking in a programmable, but in my next post, I’ll show how to use this information to pull the post from Sanity. As I’ve previously mentioned, this could also easily be done using another CMS like Sitecore XM Cloud or Content Hub ONE, which I may do a mini-series into at some point. But before we wrap up for today, there is one last bit to this exercise that I want to bring up. Look at our screenshot of our Test of our programmable, and there is a timing of how long are test took to run. This is important to keep in mind, because these run server-side in Sitecore Personalize when you’re navigating a page on your site, to determine if this experience that is using this decision model variant should run. It’s vital that these decision models are built to run as efficiently as possible, which we’ll look into more next time because we’ll be calling into a second system. You should always consider how important is it that this test run will show a personalized result? If for some reason we call into another system and that system takes 10 seconds to return a result then that’s unacceptable and we should look at alternative ways to add this capability or cut the connection off if it’s taking too long to respond. So just wanted to call this out before I close out this post.
Thank you and see you next time!